Put Your Products on Show with Blister Cards
Blister cards are printed paperboard backings used with a formed blister cavity to create retail packaging. The clear cavity displays the product, while the card carries your branding, instructions and purchasing information.
Give hardware accessories, stationery, craft supplies and personal care products a proper place on the peg. OXO Packaging helps UK businesses develop printed blister cards around their products, artwork and display requirements. Whether you are launching a new range or refreshing an existing pack, start with 100 units and request a 3D mockup to review the design.
Choose Blister Card Materials That Suit Your Product
For a heat-sealed design, start with blister-grade paperboard and a sealing coating compatible with the plastic blister. Specify the backing and clear cavity together so the materials suit the intended packing process.
When comparing paperboard stocks, look at three different properties:
- Grammage (GSM): the weight of the board per square metre.
- Caliper: the thickness of the board.
- Stiffness: how well the board resists bending.
GSM alone does not tell you how thick or rigid a card will be. Match the specification to your product weight, card size, and hanging arrangement. Share these details with our team so material selection starts with how the pack will be used.
Make Printed Blister Cards Work for Your Brand
Build the artwork around what shoppers need to see first: your brand, the product name and its main benefit. Use the remaining space for pack quantities, instructions and other useful product details.
Our free design support helps you arrange the layout around card edges, folds, cut-outs and the blister area. Share your logo, preferred colours, product copy and any retailer requirements to give the design a clear brief.
Match Blister Card Styles and Sizes to Your Display
Discuss the card construction alongside your blister and packing process. Common formats to consider include face-seal, trapped-blister and fold-over cards.
|
Card style
|
How it works
|
|
Face-seal backing card
|
A formed blister is sealed onto one coated card, leaving space around the cavity for branding.
|
|
Trapped-blister card
|
The blister flange sits between two joined card faces, enclosing its edge within the card construction.
|
|
Fold-over card
|
A creased card creates two panels for extra information or a hinged trapped-blister layout.
|
Specify the overall card width and height in millimetres, alongside the cavity footprint, depth and flange dimensions. The flange is the flat border around the blister where it attaches to the card. Allow room for the hanging slot, artwork and sealing area.
If you already use a particular blister, share its drawing or dimensions. Include any plastic blister or packing requirements in your brief so the quotation states what is included.
Refine Printed Blister Cards with the Right Prints and Finishes
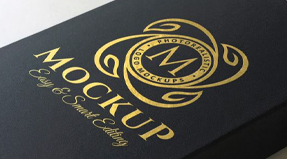
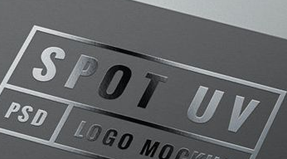
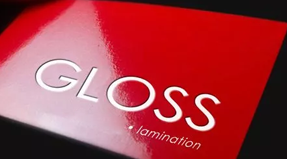
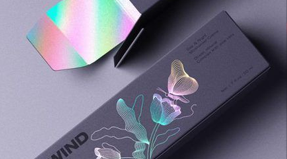
Bring your brand colours, product images and instructions together with full-colour CMYK printing. Choose matt or gloss finishes, or discuss selective details such as foil and spot UV. Match the final finish to the card construction and sealing method.
Keep decorative treatments outside functional sealing areas unless the complete specification has been checked for compatibility. A decorative finish and a heat-seal coating perform different jobs, so plan both into the design.
For retail barcodes, preserve their proportions, use strong contrast and leave the required clear margins. Keep the code away from the card edge and reserve an unobstructed area for scanning.
Add Practical Features to Your Blister Card Design
Make room for details that help your packaging fit the display and buying journey. Depending on the agreed card construction, discuss:
Euro slots or hanging holes matched to your retailer’s display.
Shaped outlines and rounded corners that complement the product.
Scored fold lines for hinged or fold-over designs.
Perforations for a planned opening feature, where the construction allows.
Printed QR codes linking to instructions, product support or reordering.
Choose each addition for a clear purpose. Check how cuts and folds affect the card structure, and keep essential artwork clear of openings and sealing areas.
Get More from Your Blister Cards at Every Stage
You can go for endless distinctive features for your blister cards. Some of these features are mentioned here:
Show Your Product Clearly with Blister Packaging
A clear blister lets shoppers view the item, while the card provides space to explain it. Place essential purchasing details where they remain visible once the blister is attached.
Help Blister Packs Hang Neatly on Retail Displays
Position the hanging slot with the product’s weight and balance in mind. Check the layout against the intended display so the pack hangs neatly and leaves the product name easy to read.
Preview Your Printed Blister Cards with a 3D Mockup
Use the 3D mockup to assess artwork placement, layout and overall appearance. It provides a visual preview; physical fit and sealing performance depend on the production materials and packing process.
Order Blister Cards Wholesale with OXO Packaging
Get your next retail run sorted with wholesale pricing from 100 units, free shipping, free design support, and no die or plate charges for your blister card order. Our turnaround time is 10 to 12 business days, and a 3D mockup is available to help you review the design.
Send us your product dimensions, weight, quantity, artwork and any existing blister specifications. Tell us how the pack will be displayed and assembled so your quote reflects the job you need.
Request your blister cards quote today.




.png)




 Request a Quote
 Approve Art Work
 Receive Your Order